


Hardware Upgrade Compatability
Published date: 22 April 2026
Introduction
Hardware upgrades can extend the life of a computer, improve performance, and solve capacity problems, but only if the new parts actually work with what you already have. Compatibility issues are one of the most common causes of wasted time and money during upgrades. A drive that does not fit the bay, memory that the motherboard cannot address, or a network card that lacks driver support can turn a straightforward improvement into troubleshooting and returns.
Ensuring compatibility is not about guesswork or brand matching. It is a methodical process of understanding your system’s constraints, then mapping those constraints to the technical standards of the parts you want to install. That means checking physical space, power and cooling headroom, interface types, and chipset limitations. It also means verifying that the operating system, firmware, and drivers can recognise and properly use the new hardware, especially for newer standards like NVMe SSDs, higher density RAM modules, and modern Wi-Fi adapters.
This article walks through a practical approach you can use across desktops, laptops, and small servers. The goal is to help you plan upgrades with confidence, minimise downtime, and avoid those subtle incompatibilities that only show up after you have opened the case. Whether you are adding storage, expanding memory, or improving connectivity, the same principles apply: measure, verify, and test in a controlled way.
Assessing system requirements and constraints
Start by defining what you need the upgrade to achieve. “More storage” can mean higher capacity, higher speed, better endurance, or all three. “More memory” might be for running more browser tabs, hosting virtual machines, or speeding up data analysis. Clarifying the use case helps you choose the right component class and prevents overbuying the wrong spec.
Next, inventory the current system. For desktops and servers, identify the motherboard model, CPU, existing memory configuration, storage devices, available PCIe slots, and power supply rating. For laptops and compact systems, also note chassis limitations, available bays, and whether parts are soldered. The quickest path is usually a system information tool that reads motherboard and memory details, combined with a visual check of what ports and slots are physically present.
Then assess constraints that commonly block upgrades:
Physical space and mounting. Storage drives come in different sizes, such as 3.5-inch and 2.5-inch, and M.2 modules vary in length. A part can be electrically compatible but still not fit. Check available drive trays, bracket requirements, and M.2 standoff positions. For small form factor PCs, also consider clearance around heatsinks and cables.
Power and thermals. A higher performance SSD may be fine, but a more powerful GPU or PCIe accelerator might exceed power supply capacity or airflow. Even storage upgrades can affect thermals. Some NVMe SSDs run hot under sustained writes and may throttle without a heatsink or sufficient airflow.
Workload and endurance. Especially for storage, match the upgrade to the write workload. Heavy write environments like video editing caches, databases, or virtualisation benefit from higher endurance ratings. Capacity alone is not the full story.
Operational constraints. Plan for downtime, backups, and rollback. If you are upgrading a business-critical device, have a tested backup and confirm you can revert if a firmware or driver issue appears.
Finally, decide whether the upgrade is additive or replacement. Adding a second drive is different from migrating the operating system to a new SSD. Expanding memory may require matching existing modules or replacing them as a set for best stability. This early planning step reduces surprises when you start checking the detailed standards in the next stage.
Checking compatibility across interfaces, standards and form factors
Compatibility is a three-part puzzle: the connection standard, the physical form factor, and the platform limitations set by the chipset and motherboard design. You need all three aligned.
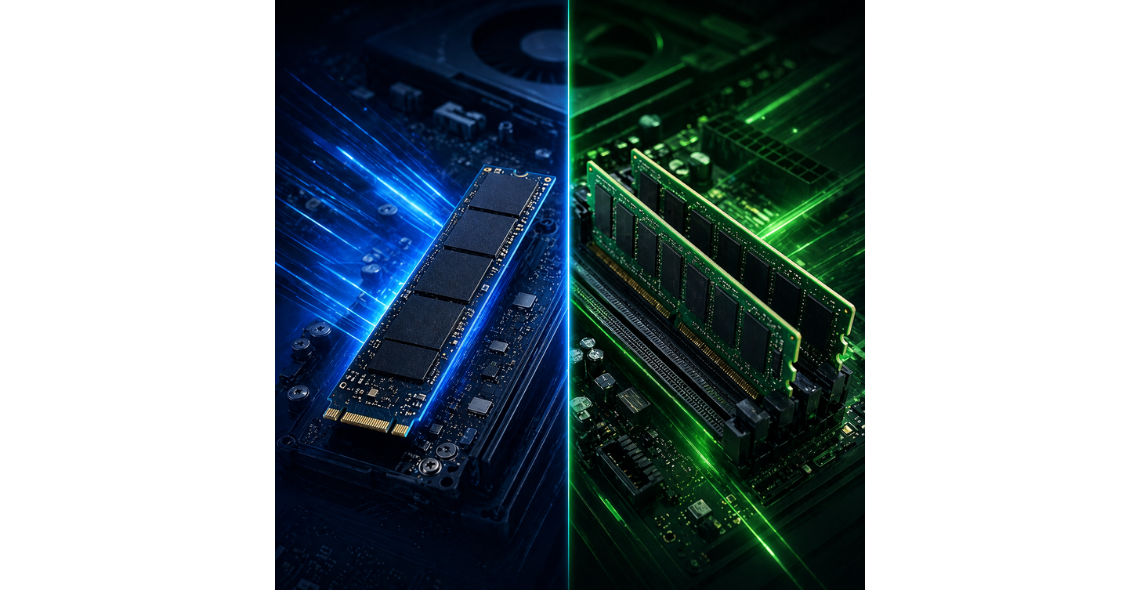
Storage interfaces and form factors. For SATA storage, confirm the system has available SATA ports and power connectors, and that there is a suitable 2.5-inch or 3.5-inch bay. For M.2 storage, distinguish between M.2 SATA and M.2 NVMe. They can look similar but use different signalling. Many boards support only one type in a given slot, or they share lanes with other ports. Check whether using an M.2 slot disables one or more SATA ports or reduces PCIe slot bandwidth. Also confirm the M.2 keying (commonly M-key for NVMe) and the module length supported, such as 2242, 2260, 2280, or 22110.
PCIe and lane availability. Expansion cards and NVMe drives depend on PCIe lanes. A system may have a full-length slot but only wired for fewer lanes. For example, a card may physically fit an x16 slot but require x8 electrical lanes for full performance. Also consider that some platforms split lanes between slots, M.2 sockets, and onboard controllers. If you are adding multiple NVMe drives or high-throughput networking, lane planning matters.
Memory standards. RAM compatibility depends on the generation (DDR3, DDR4, DDR5), form factor (DIMM for desktops and servers, SO-DIMM for laptops), speed ratings, voltage, and whether the platform supports ECC. Many systems can run faster-rated RAM at a lower speed, but mixing speeds and timings can reduce stability. Also check maximum capacity per slot and
total supported memory. Some systems cannot use higher density modules even if they are the correct DDR generation.
Server and workstation specifics. If the device is a server or workstation, confirm requirements around registered DIMMs, load-reduced DIMMs, or ECC. Consumer platforms typically do not support RDIMM or LRDIMM, and installing the wrong type simply will not work. Similarly, storage backplanes in rack or tower systems may require specific drive carriers or support only certain drive thicknesses.
Networking and I/O. Upgrading Wi-Fi or Ethernet often involves PCIe, M.2, or USB interfaces. For Ethernet cards, check the PCIe generation and lane requirement, and confirm the system can physically accommodate the bracket height. For Wi-Fi modules, many laptops use M.2 A/E-key, but some systems whitelist modules or have antenna connector limitations.
When in doubt, match the upgrade to the exact system model and motherboard revision. Two machines that look identical can have different boards or firmware that changes what standards are supported. Treat “fits” and “works” as separate checks, and validate both.
Verifying firmware, drivers and OS support
Even when the hardware fits and the interface matches, firmware and software support can make or break an upgrade. This is especially true for storage and networking, where the system must detect the device early in the boot process and the operating system must have stable drivers.
BIOS/UEFI support for new hardware. Motherboard firmware determines whether an NVMe drive is bootable, how memory training works, and whether certain PCIe devices initialise correctly. Before installing a new component, check the current BIOS/UEFI version and the vendor’s release notes for improvements related to storage, memory, or PCIe compatibility. If an update is needed, apply it carefully using the recommended method, ideally with reliable power and without other changes happening at the same time.
Storage firmware and features. SSDs have their own firmware that can affect performance, stability, and power management. Verify that the drive supports features your environment relies on, such as TRIM, power loss management expectations, and hardware encryption standards if relevant. For laptops, check support for low-power states, because some combinations of SSD firmware and platform power management can cause wake or sleep issues.
Operating system support. Confirm that your OS version supports the hardware. Some newer Wi-Fi chipsets or 2.5GbE adapters need modern drivers that may not be available on older OS builds. For NVMe drives, most current OS versions have built-in support, but booting from NVMe on older platforms may require firmware support rather than just OS drivers.
Driver sourcing and stability. Prefer drivers from the device manufacturer or the system vendor when available, and avoid unofficial sources. For business environments, consider using drivers that are widely deployed and tested, and stick to a controlled update schedule. After installation,
validate device manager status, link speeds for networking, negotiated PCIe speeds for NVMe, and run a short stress test to confirm stability.
Security and policy considerations. In managed environments, endpoint security, disk encryption, and device control policies may interfere with new hardware. Full-disk encryption can complicate drive migration, and secure boot settings may block some drivers. Plan for these interactions before the upgrade window.
Testing and rollback. Compatibility verification is not complete until you test. For storage, check SMART health, run a benchmark to confirm expected throughput, and verify sustained performance if your workload is write-heavy. For memory, run a memory test to detect intermittent errors. Keep the original parts and a known-good boot option until the upgraded system has run reliably for a period.
By treating firmware and OS support as a first-class part of compatibility, you avoid the scenario where everything appears correct on paper but fails during boot or under load.
FAQs
What is the quickest way to check what hardware my system can accept?
Start with three data points: the exact system model, the motherboard model, and the current configuration of memory and storage. On many machines you can find the system model in BIOS/UEFI or in the OS system information panel. From there, look up the technical specifications for that exact model and pay attention to maximum memory, supported memory type, available storage interfaces, and expansion slots. Then physically inspect the machine for available bays, spare connectors, and open slots, because documentation does not always reflect how the system was shipped. For laptops and compact PCs, confirm whether memory or storage is soldered. If you cannot find definitive documentation, treat the upgrade as uncertain and prioritise reversible changes, such as adding a secondary drive rather than replacing the only boot drive.
Can I mix different RAM brands or speeds if the type is the same?
Often you can, but it is not guaranteed to be stable. The key is that the memory generation and form factor must match the motherboard, such as DDR4 DIMM or DDR4 SO-DIMM. When you mix speeds, the system typically runs all modules at the speed of the slowest module, and timings may be adjusted for compatibility. Problems arise when modules have different ranks, densities, or voltage requirements, or when the motherboard has strict memory training behaviour. For best results, use identical modules or a matched kit, and populate slots according to the motherboard’s recommended order. If you must mix, aim for the same capacity per module and similar speed and timings, then run a memory test after installation to catch intermittent errors that might not show up immediately.
How do I know whether my M.2 slot supports NVMe or only SATA?
You need to confirm both the electrical support and the keying. An M.2 slot can be wired for SATA, PCIe (NVMe), or sometimes both, and the device must match what the slot provides. Check your motherboard or system documentation for wording like “M.2 PCIe x4 NVMe” or “M.2 SATA”. Also look for notes about shared resources, such as “using this M.2 slot disables SATA port 1”. The physical key can provide a clue: many NVMe drives use M-key, while SATA M.2 drives are often B-key or B+M-key, but keying alone is not a guarantee because some slots accept multiple key types. If documentation is unclear, you can check BIOS/UEFI storage menus for NVMe detection or consult the board layout diagram to see how the slot is wired.
Will a newer, faster SSD work in an older system?
Usually yes, but it may not reach full speed, and boot support can be the limiting factor. A SATA SSD is generally backward compatible with older SATA controllers, though it will run at the maximum speed the controller supports. For NVMe SSDs, an older motherboard may have an M.2 slot with fewer PCIe lanes, or it may only support PCIe Gen3 rather than Gen4 or Gen5, which limits throughput but still allows the drive to function. The bigger issue is whether the system firmware supports booting from NVMe. Some systems can use an NVMe drive as a secondary data drive but cannot boot from it without a BIOS/UEFI update. Plan for these limitations, and if you are migrating the operating system, confirm bootability before you commit to the change.
What should I do before upgrading the boot drive to avoid downtime?
Back up first, then validate the migration path. Create a complete backup of important data and, ideally, a system image you can restore. Confirm you have recovery media and that you can access BIOS/UEFI settings if you need to change boot order. Decide whether you will clone the existing drive or perform a fresh install. Cloning is faster but can carry over old partitioning, misalignment, or driver issues if the original installation is messy. A fresh install is cleaner but takes longer and requires application reinstalls. If full-disk encryption is enabled, plan how you will suspend or manage it during migration. After the upgrade, verify that the system boots reliably, that performance is as expected, and that the old drive is kept intact until the new setup has been stable for a while.
How can I avoid compatibility problems when adding a network card or upgrading connectivity?
Start with the interface and driver support. Confirm whether the card uses PCIe, M.2, or USB, and that your system has a compatible slot with enough physical clearance. Then confirm OS driver availability for that exact chipset, not just the brand name on the box. For Wi-Fi upgrades in laptops, check whether the system uses an M.2 A/E-key module and whether the antenna connectors match the card. Also consider your network infrastructure: installing a 2.5GbE or 10GbE adapter will not help if the switch and cabling cannot support those speeds. After installation, verify link speed negotiation, stability under sustained transfer, and power management behaviour, especially on portable systems where sleep and wake can expose driver issues.
Conclusion
Compatible hardware upgrades come down to disciplined checks rather than trial and error. First, assess your goals and constraints: what performance or capacity you need, what physical space you have, and what your power and cooling can handle. Next, validate standards and form factors. That means confirming the correct storage interface, whether an M.2 slot supports NVMe or SATA, how PCIe lanes are allocated, and which memory generation and module type your platform accepts. Finally, treat firmware and software support as essential. A BIOS/UEFI update can be the difference between a working NVMe boot drive and a device that only appears after the OS loads, while the right drivers and OS version determine stability for networking and newer chipsets.
After installation, test like you mean it. Check device detection, negotiated link speeds, SMART health for drives, and run memory or storage stress tests to catch intermittent faults. Keep a rollback plan and retain original components until the upgraded system has proven stable.


Comments
There are currently no comments, be the first to comment.